CLINIC PHOTOGRAPHY
Crystal clear
Clinic photography expert Clint Singh on how to accurately capture before–and–after results in dark–skinned patients
CLINT SINGH
Clint Singh is a professional photographer and founder of Clinical PhotoPro, which creates solutions to photography problems specific to the aesthetics industry. Working with leading UK clinics, Clint helps clinics and practitioners ensure accurate client documentation and standardisation with photography. In 2020, Clinical PhotoPro launched LED light stands that let clinics achieve studio-quality images using smartphones and tablets.
Photographic documentation of your patients is an essential part of any clinician’s workflow. Showing comparative before-and-after images is vital in demonstrating the effectiveness of the treatment and necessary in case of future litigation. These images will need to be of the highest quality and an accurate representation of what our eyes see. They also need to be identical in dimensions, quality, exposure, and colour to see treatment improvements. This is easier said than done, as there is a lack of standardisation and guidance in the industry on how to do it correctly. A further complication arises when accurately recording realistic skin tones.
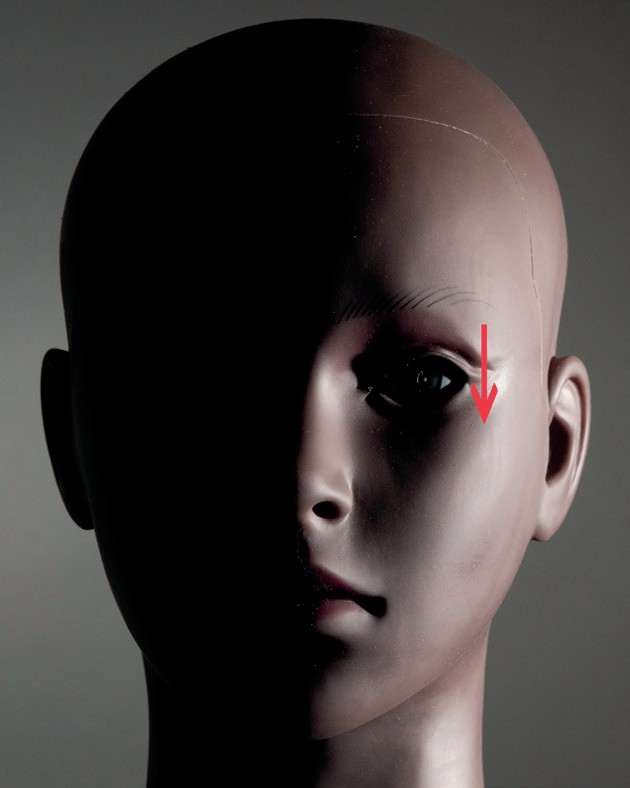
Image 1
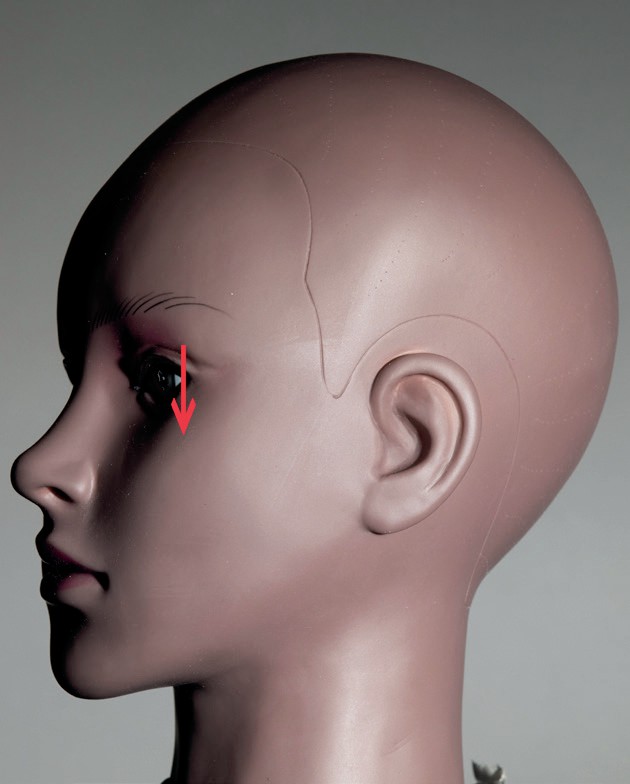
Image 2

Image 3
ACCURATE REPRESENTATION
In general, we need to see detail and contrast in the skin. When photographing darker skin, we tend to want to add more light to highlight detail, and in doing so, we use excessive light, overexposing the image, or use lighting from wrong angles, making it even harder to see the detail and contrast. So, having a good understanding of how to use lighting is essential. It’s worth pointing out that it is entirely impractical to have different shooting setups for different skin tones, especially if we try to keep to some sort of standardisation with workflow.
Natural light will give you results free of reflections. However, as outside ambient light is constantly changing, it is not recommended for before-and-after images because your images will not have the same exposure and colour temperature. Direct light – light falling on your patient directly from the light source – will be harsh and create a hot spot, overexposing the area of the skin and limiting detail. This can be solved by diffusing the light source, but ideally, we need soft light that does not create hot spots. A light source can be diffused by placing a semi-transparent material in front of it, thus softening the light. It is easiest to buy equipment off the shelf that is made specifically for your light source. For example, use a softbox for your studio lights or flashgun. You can also soften light by bouncing the light from the source off walls or a ceiling. Take note of shadows if bouncing light off the ceiling.
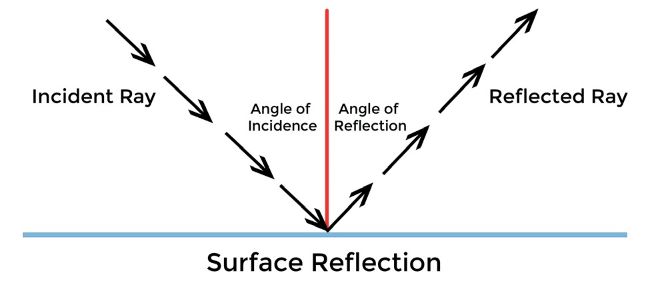
Once we have diffused the light, we now need to be cautious of the angle at which the light is falling on the patient in relation to where the camera is positioned. You might recall from physics 101; the incident ray is equal to the reflected ray, so we need to slightly change the angle of the camera or the light source so that the incident ray (the light source) and reflected ray (where the camera is positioned), are not equal.1
In image 1 (opposite page), we are trying to photograph the patients’ left cheekbone; the flash is positioned so that the incident ray is equal to the reflected ray, and this is bounced to the camera – the image is not correctly exposed. By changing the camera angle, as in image 2, the reflection has moved, but the area we need to photograph is free from any reflection. Image 3 is correctly exposed as I have used two floor-standing lights, reflected off the ceiling, with bounce cards on the lights to reflect light forward so that there are no shadows from above. The light is well diffused without any hotspots or reflections. Here, I used a Nikon D850 body, Nikon 28 – 70mm f2.8 lens, Nikon SB910 flash and Phottix Odin remote trigger and receiver.
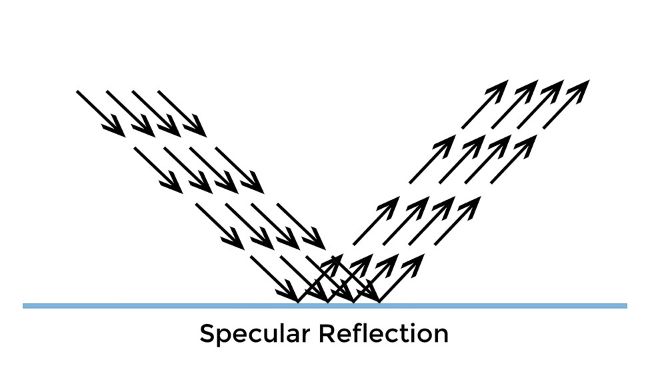
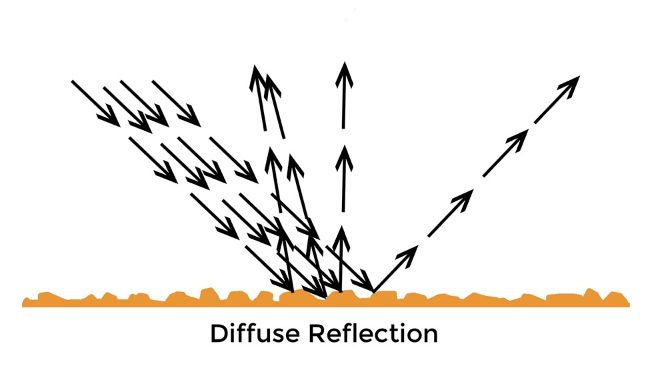
The skin also needs to be prepared to ensure optimum results. Specular reflection occurs when light is reflected off a shiny surface, like a mirror or water, or with natural oils or applied products. Ensuring the skin is clean will encourage light to reflect natural, uneven bumps on the skin, causing diffused refection,2 where light scatters unevenly.
SETUP TIPS
Clinics will be using either a DSLR camera or a smartphone/tablet for their photography; so here are some tips on these setups.
A DSLR camera will work well and lets you control the settings required to expose darker skin tones accurately. Not only can you manually control exposure, but the right camera will also allow you to manually control colour temperature, which is crucial to keep skin tones consistent when looking at before and afters. There are several ways of lighting your patient while reducing the effects similar to specular reflection. Using the flashgun on the camera and aiming the flash directly to the area on the patient does not work well as this is direct light and will create a hotspot and overexpose the area. Light angles come into play here as the incident ray and reflected ray follows the same path and reflect back to the camera.
The light source has to be off the camera and needs to be triggered remotely, considering the light angles mentioned before. The power of the light unit has to match the settings on the camera and should be in manual power mode so the settings can be replicated for consistency. Use a softbox to diffuse the light. Care should be taken here, as the distance of the light source to the patient needs to be the same for consistency. Light follows an inverse square law.; it is inversely proportional to the distance squared. If you double the distance, light is only 1/4 of its original brightness.3 Even a slight change in distance between the patient and the light will affect consistency.
You want to use a background that gives contrast to a patient with dark skin tones. With a DSLR camera in manual mode, you are not restricted by the colour of the background and can control the colour of the image manually. A white background will work well for this. Although a DSLR camera and flash setup will give you the highest quality images, it is worth noting here that there are some disadvantages to this combination. For instance, you cannot see where the reflections on the skin are until you capture and review the image. The lighting cannot be moved between sessions if you want to maintain consistency, plus you will need expert knowledge to set up the camera and lighting manually.
A smartphone/tablet arrangement is a much easier option. This simple point-and-shoot solution requires no advanced photography knowledge or training, and the images can be saved directly to your patient-management apps already on the device. Capturing before and afters on these devices are difficult to master before considering capturing darker skin tones, however with understanding on how they work, this can easily be achieved. These devices automatically expose and colour-correct the image depending on the environment, so whatever light falls on their sensors is used by an internal algorithm for the resulting image. By creating a stable lighting environment and controlling the colours in the camera’s field of view, we can achieve accurate and consistent image capture for all skin tones with a simple adjustment.
THE RIGHT LIGHT
Firstly, we need to stabilise the auto settings on the device by providing a stable lighting environment for a consistent light source. LED lights work well for this as they do not produce a lot of heat. The lights need to be tall and positioned at 45 degrees to uniformly illuminate the patient. Avoid using lights that need height adjustment, for example, ring lights, as the numerous adjustments on height and angles cannot be replicated. Even if they are left in place between sessions, you need to make height adjustments for different patients. The same laws of light come into play, so ensure the distance of the lights and the patient are the same between sessions for uniformity. Use floor markers to maintain consistency.
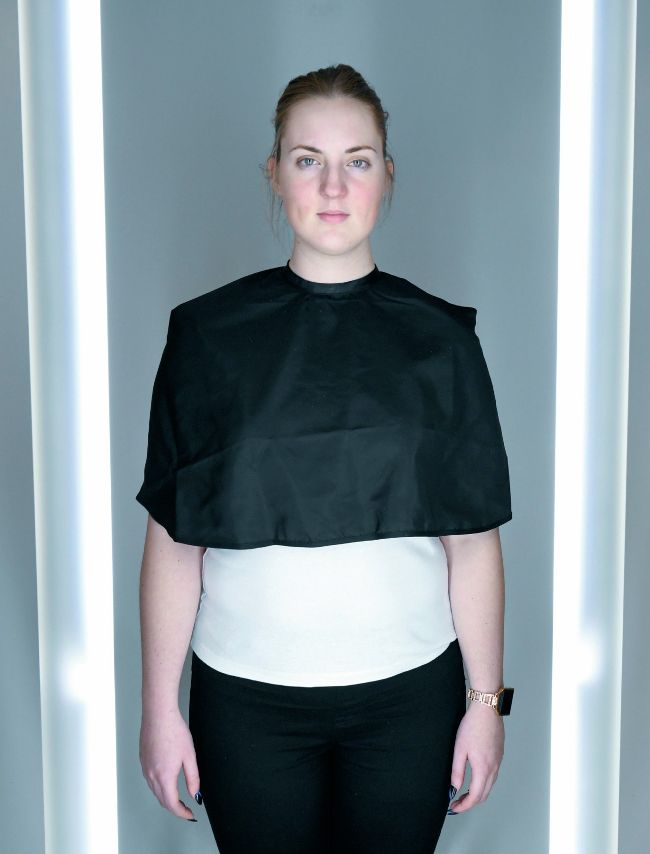
Image 4

Image 8

Image 5

Image 6

Image 7
BACKGROUND AND POSITIONING
We now need to control the colour temperature and exposure of the image. Using a white background, we contrast darker skin colour and help the camera expose the image accurately. Using any other colour background will result in tones that are not an accurate representation of the skin. Clothes need to be covered with a cape. When photographing a lighter skin tone, a black cape produces realistic results (Image 5), however, this will now overexpose a darker skin tone (Image 6). A white cape will force the camera to lower the exposure, producing a true to life skin tone (Image 7).
Remember, the camera uses whatever is in its field of view to expose the image correctly. If you move the camera closer to the patient, less of the white background will be used, and your images will not only be of different sizes but also different exposure and colour temperature. Moving the camera away from the patient will let the camera see too much of the white background and lower the image’s exposure. For consistency with your before and after images, use the same distance between your patient and the mobile phone/tablet. As this is consistent lighting, you can see the reflections on the skin before capturing them. By repositioning the angle of the patient, any reflection falling on the area you need to photograph will move, leaving the area you want to capture free of reflections. Note; this environment can also be used with a DSLR camera in auto or manual setting.
Using this method, the images opposite (Image 8) were taken on a mobile phone and are identical, showing true skin tone. Here, I used an iPhone Xs and Clinical PhotoPro LED lights.
Following this setup, you will have a simple point-and-shoot solution using your mobile phone or tablet to adapt to any skin tone. And remember, consistency is key.
REFERENCES
1. Laws of Light. Lumen Learning. 2021. The Law of Refection. [ONLINE] Available at: https://courses. lumenlearning.com/physics/chapter/25-2-the-law-of-reflection/. [Accessed 2 April 2021.]
2. Specular reflection and diffuse reflection. Molecular Expressions. 2018. Physics of light and colour. [ONLINE] Available at https://micro.magnet.fsu.edu/primer/java/reflection/specular/index.html. [Accessed 2 April 2021].
3. Hyperphysics. 2021. Inverse Square Law, Light. [ONLINE] Available at: http://hyperphysics.phy-astr.gsu.edu/ hbase/vision/isql.html. [Accessed 12 August 2020].